Image Compression Workflow for Design Teams: Figma/Sketch to CDN
Compress design system assets from Figma or Sketch to CDN with per-tier Zipic presets, folder monitoring, and a naming convention engineering can ship.
A solo creator publishing a single hero image per post can get away with a quality slider. A design team running a component library, a marketing site, and three localized product apps cannot. Once you cross the threshold from “this image” to “every asset that lives in our design system,” the bottleneck is no longer how hard you compress — it is whether the same source export becomes a predictably named, predictably sized, predictably compressed file every single time, without a designer or engineer thinking about it.
This is what compress design system assets actually means in practice. Not a one-shot tool, but a pipeline: Figma or Sketch export → tiered folders → automatic compression with the right preset for each tier → handoff to engineering and CDN. This guide is for design ops leads, design engineers, and senior designers who own that pipeline on macOS — and who would rather codify it once than babysit it forever.
The four asset tiers in a design system
Before you compress anything, classify it. Most design systems end up with four tiers, and each tier has different quality, format, and file-size requirements. Mixing them under one preset is the single biggest reason “we have a design system but the marketing site still ships 8 MB JPEGs.”
| Tier | Examples | Where it lives | Format target | Compression posture |
|---|---|---|---|---|
| Iconography | UI icons, glyphs, brand marks | Component library / icon font | SVG (preferred), PNG fallback | Lossless; SVGO for SVG, level 2–3 for PNG |
| Illustration | Spot illustrations, empty states, marketing scenes | Component slots, marketing pages | WebP or PNG with alpha | Visually lossless, level 3 |
| Product imagery | Screenshots, hardware shots, device mockups | Docs, marketing, OG cards | WebP (or AVIF) over JPEG | Aggressive level 3–4 |
| Marketing & social | Hero banners, OG cards, paid ad creative | CDN-fronted marketing pages | JPEG for OG (compatibility), WebP for hero | Level 2–3, target ~200–500 KB |
The tier model matters because the compression knob is not “how much,” it is “how much given this tier’s job.” An OG card that every social platform re-encodes should leave your build over-compressed in the JPEG quality sense — there’s no point shipping a 2 MB file that LinkedIn will re-encode to 200 KB anyway. An icon, on the other hand, has to stay pristine because it renders at the smallest physical size on the device.
The @1x/@2x/@3x problem (and what your design tool actually exports)
If your design system supports both web and mobile, every raster asset above the icon tier needs at least three sizes. The format question, though, depends on which tool the source lives in — and the two most common tools in 2026 take opposite stances.
Figma’s export documentation confirms what teams hit on day one: PNG and JPG accept 1x, 2x, 3x or any custom multiplier; SVG and PDF only export at 1x. There is no native WebP exporter in Figma — even in 2026 — so a Figma exports folder is always full of PNGs or JPGs until something else handles the conversion.
Sketch takes the opposite approach. The Mac app exports PNG, JPG, HEIC, TIFF, and WebP natively, alongside SVG, PDF, and EPS, with scale multipliers from 0.25x and 0.5x all the way up to whatever custom value you need. The 2026 Barcelona update even added P3 wide-gamut color to WebP exports — meaningful if your team ships to Display P3 hardware. Sketch never went away; a fair number of senior macOS designers have come back to it specifically because the native format coverage removes one step from every export.
Either way, a downstream compression pass earns its keep. The clean handoff is:
- The design tool exports the highest scale you need (usually 3x for mobile, 2x for web hi-DPI). PNG out of Figma; PNG or WebP out of Sketch.
- A compression step normalizes everything to the target format and writes it to the right folder. WebP for the web tiers, PNG for the icon tier.
- Optionally, a second pass derives the intermediate scales (2x and 1x) by resizing the master.
The video below shows Zipic running format conversion on a folder of exports — drive it the same way from a Figma or Sketch exports folder once it’s monitored.
The folder layout that mirrors your tiers
The cleanest pipeline I’ve seen pairs one folder with one Zipic preset. The folder name encodes the tier; the preset encodes the compression policy. Designers drop files into the folder; engineers consume from the same folder’s compressed twin.
~/Design/exports/
├── 01-icons/         → Zipic monitors → SVGO + PNG level 2 → ~/CDN-staging/icons/
├── 02-illustrations/ → Zipic monitors → WebP level 3, max 1600 px → ~/CDN-staging/illustrations/
├── 03-product/       → Zipic monitors → WebP level 4, max 2400 px → ~/CDN-staging/product/
└── 04-marketing/     → Zipic monitors → WebP level 3 + JPEG OG variant → ~/CDN-staging/marketing/
Two reasons this layout pays off. First, designers do not need to remember which preset to pick — the folder is the preset. Second, when a new designer joins or you onboard a new contractor, the entire compression policy is one screenshot of the Automation panel, not a Notion page they’ll never read.
The numeric prefix (01-, 02-) is intentional: it keeps the folders sorted in the order you actually walk through them during an audit, and it survives sync to any cloud drive without alphabetizing surprises.
Setting up the per-tier presets in Zipic
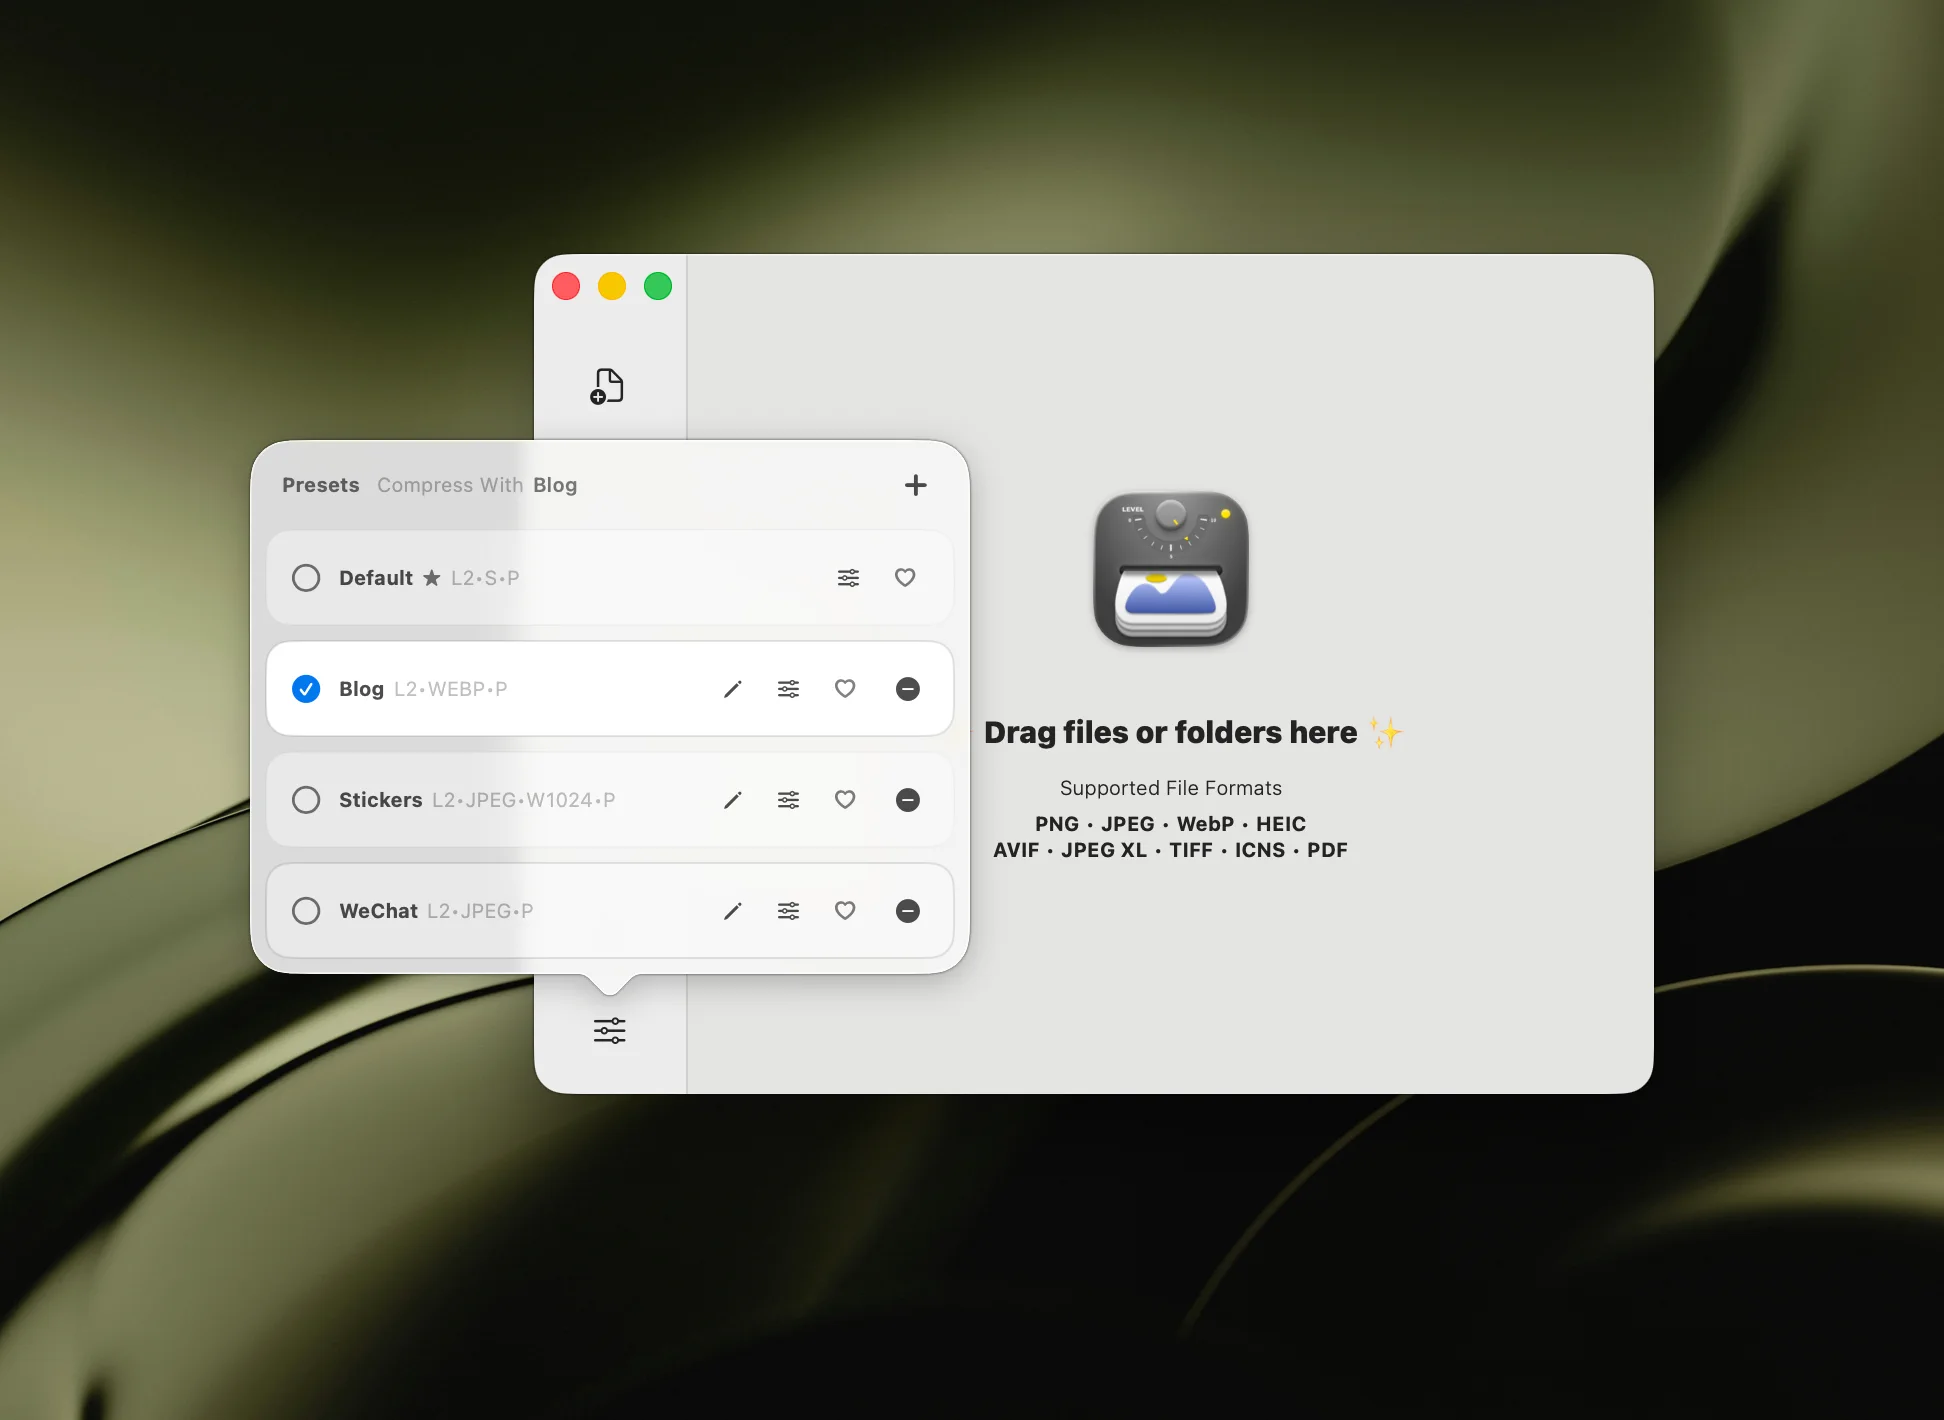
Open Zipic and click Compression Settings at the bottom-left of the main window to see the preset list. Click the + in the top-right to create one. Each tier gets its own preset with its own format, width cap, and level (Zipic’s level scale is 1–6; higher means smaller).
Concrete settings to copy:
- Icons (PNG) — Format
png, level 2, no resize. Lossless visually; level 2 still strips metadata and re-encodes optimally. - Illustrations (WebP) — Format
webp, level 3, width 1600. Preserves alpha; ample for retina marketing pages. - Product imagery (WebP) — Format
webp, level 4, width 2400. Aggressive but still indistinguishable from source on photographic content. - Marketing hero (WebP) — Format
webp, level 3, width 1920. Matches a typical hi-DPI hero slot. - OG card (JPEG) — Format
jpeg, level 3, width 1200, height 630. The 1.91:1 OG aspect; JPEG for maximum platform compatibility.

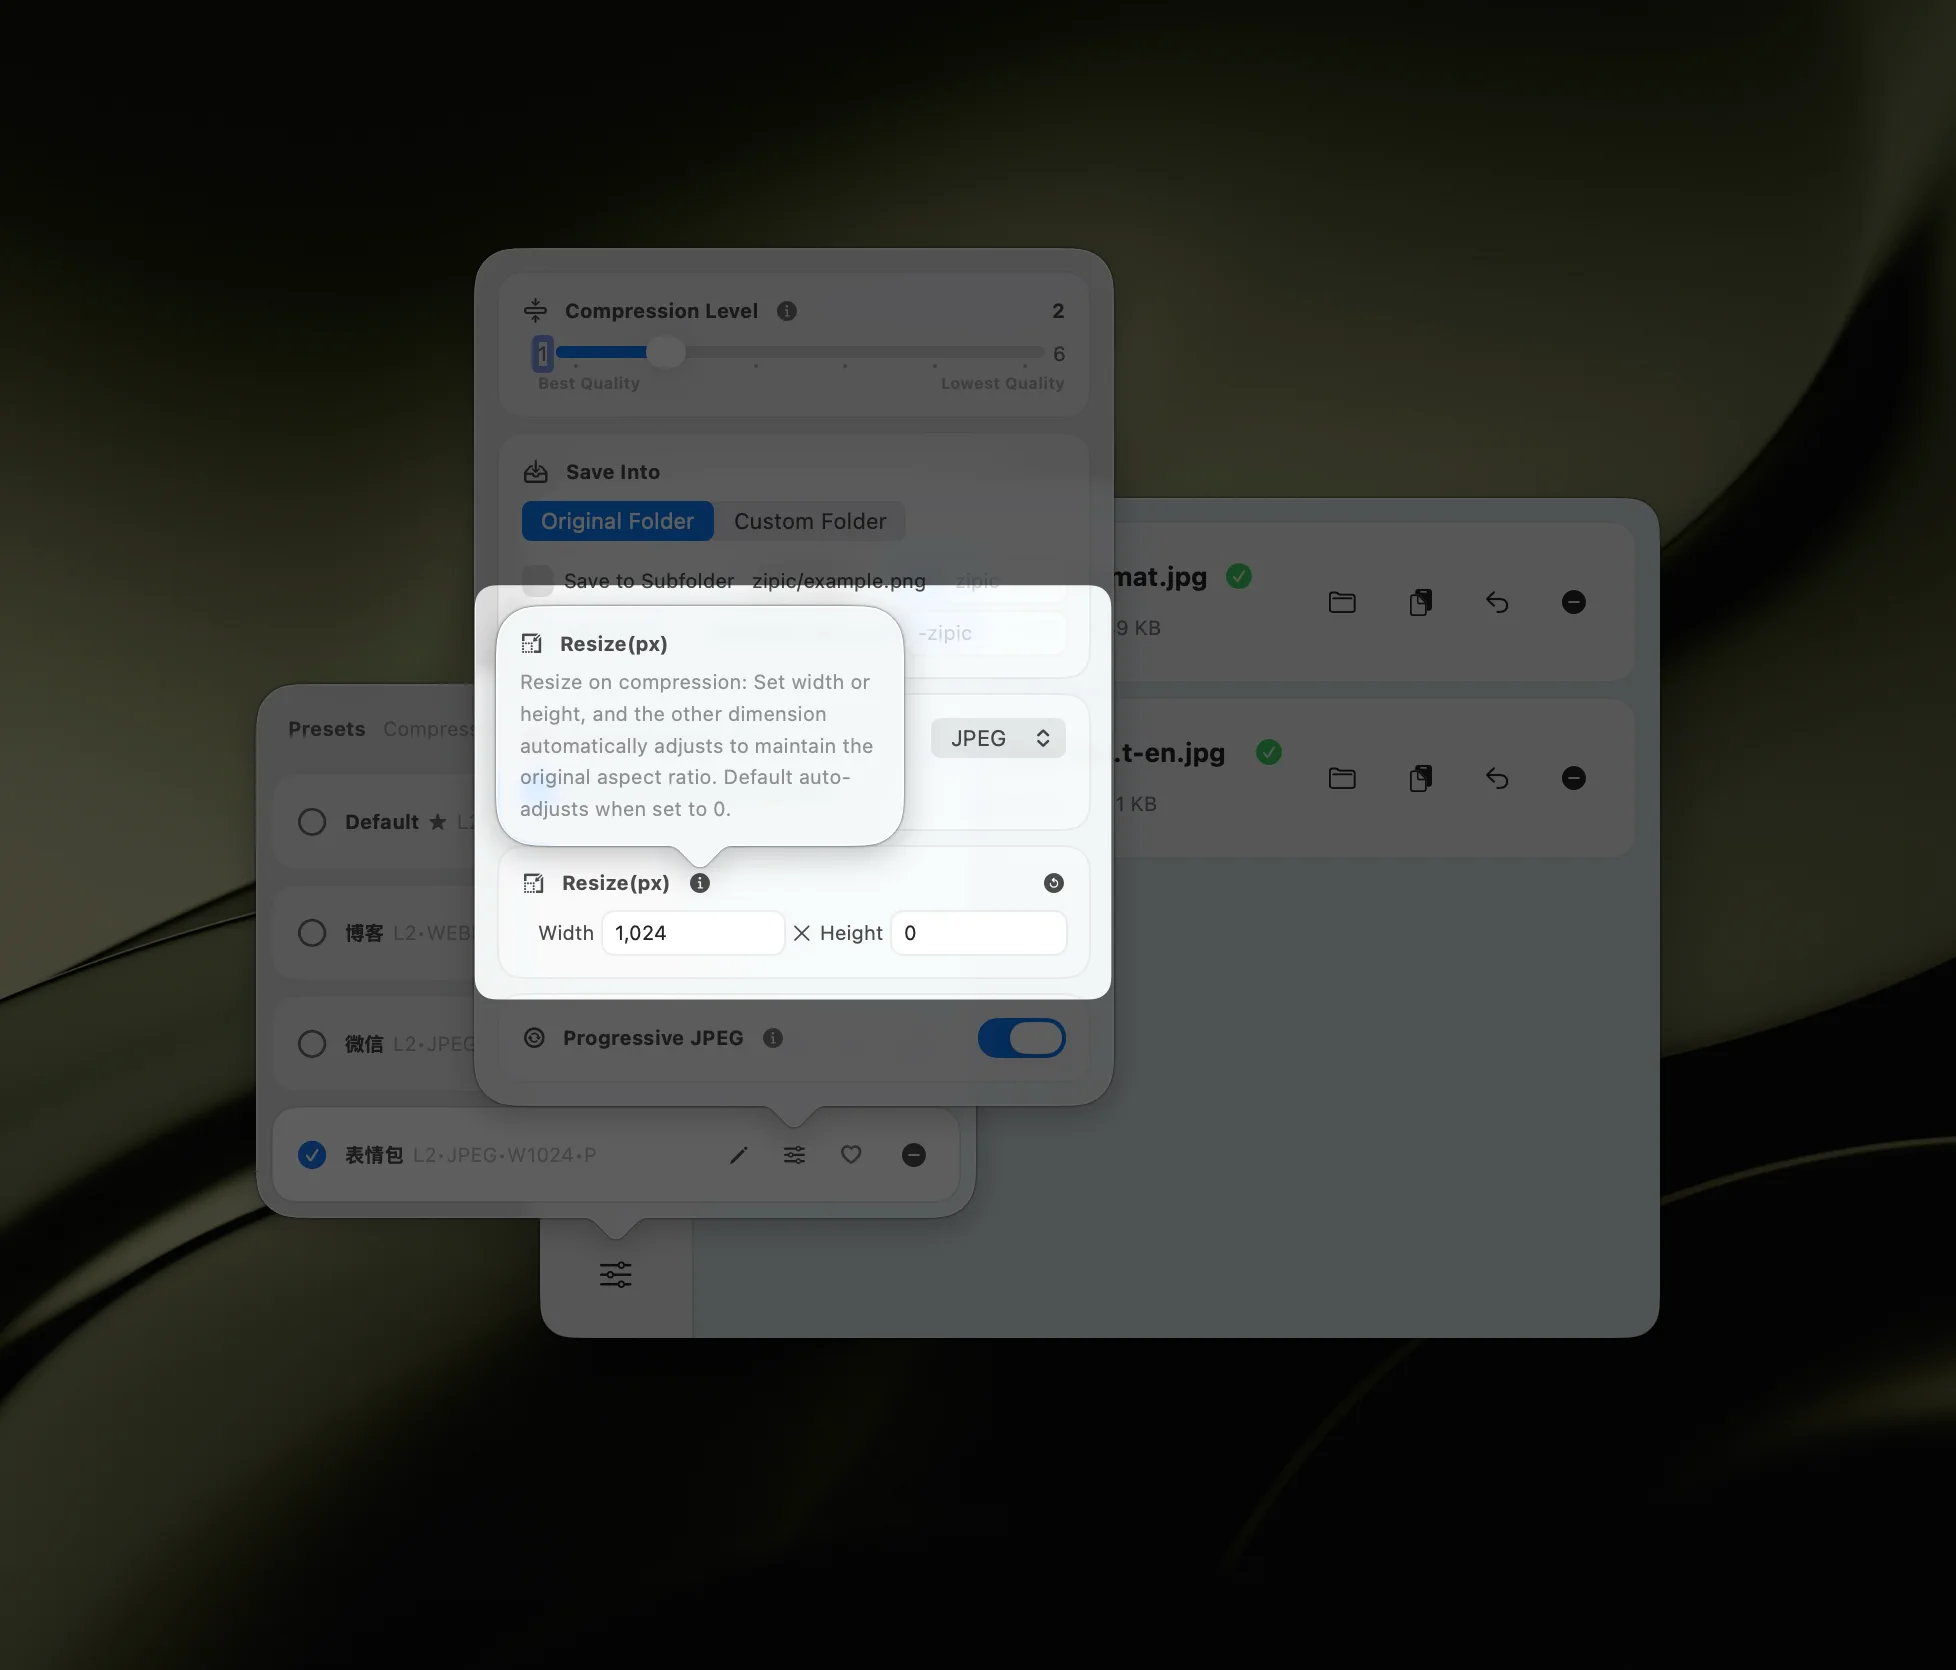
Width caps matter as much as the level. Resizing an export down to its display size is almost always a bigger win than turning the level up — a 4000 px illustration crushed to 200 KB still wastes bytes on pixels that get scaled away in the browser. Keep the level moderate, cap the width at the maximum the layout asks for, and let resize do the heavy lifting.
Wiring up folder monitoring per tier
Folder monitoring is what turns the preset list into a pipeline. It is a Zipic Pro feature; the Folder Auto Compression guide walks through the setup, and the short version is: Settings → Automation → +, pick a folder, click Compression Options, attach a preset.
Repeat once per tier folder. The result is four monitored entries, each with its own preset. When a designer exports from Figma into 02-illustrations/, Zipic picks up the file, runs the illustration preset, and writes the output to whatever save location you’ve configured. Smart Skip ignores anything it has already compressed, so re-running a folder on a new designer’s first day is safe.
The depth setting matters here. Default is 2, which lets Zipic see one nested level inside each tier folder — enough for 02-illustrations/empty-states/ style sub-grouping. Push it to 3 or higher only if your designers nest exports more than two levels deep, otherwise you’re spending watcher bandwidth on directories that never receive files.
Naming conventions that survive a CDN
Tiered folders solve the compression policy. They do not solve the second hard problem: a CDN URL is forever, and a renamed asset is a broken one. Adopt a naming convention before you run the pipeline once.
A pattern that holds up well across teams:
{tier}-{component}-{state}-{scale}.{ext}Examples:
icon-arrow-right-solid-1x.svgillustration-empty-inbox-2x.webpproduct-dashboard-mac-3x.webpmarketing-hero-launch-may-2x.webpog-launch-may.jpeg
Three rules that prevent CDN headaches later:
- No spaces, no uppercase. Linux file systems and most CDNs are case-sensitive; “Hero.png” and “hero.png” may resolve to two different objects — or one may simply 404.
- Encode the scale in the filename, not the directory.
icon-foo-2x.pngsurvives a folder reshuffle;2x/icon-foo.pngdoes not — and most<img srcset>pipelines are happier with sibling files than parallel trees. - Reserve the marketing tier for time-bound names. A campaign hero is intrinsically dated. Burn the date into the filename (
launch-may) so the next campaign cannot shadow it.
If you fan out from one master to three scales, your compressed output for a single source becomes three files: foo-1x.webp, foo-2x.webp, foo-3x.webp. That maps directly to a srcset block on the consuming side and means your engineering team writes <img> markup once.
The handoff: design exports → engineering branch → CDN
The pipeline so far stops at “compressed file on disk.” The last mile is getting those files into your repo or your CDN bucket. Three patterns work, depending on team size and tooling:
Small team, manual handoff. Designers commit ~/CDN-staging/<tier>/ directly into a assets/ folder in the engineering repo. Compression is local; review happens in PR diffs. Works up to ~10 people; breaks at scale because it puts large binaries in git history.
Medium team, CDN bucket as truth. Compressed output goes straight to a bucket — Cloudflare R2 (storage at $0.015 per GB-month with free egress per the R2 pricing page), AWS S3 with CloudFront, or a managed image CDN like Cloudflare Images ($5 per 100k stored / $1 per 100k delivered per month). The engineering side pulls by URL, never by path. Compression still runs on the designer’s Mac — the CDN handles delivery, not optimization.
Large team, fully versioned assets. A Storybook instance or design system repo imports the assets the same way it imports the components. The advantage is that an asset version travels with the component version, so a button rewrite cannot accidentally ship the old icon. Zipic still does the per-tier compression; the only thing that changes is the destination.
In every variant, the compression decision is made once, at export time, by Zipic’s preset. The CDN’s job is delivery, not policy. Conflating the two is how teams end up running an additional imagemin step inside Webpack that fights with the upstream compression and produces the worst of both worlds.
Testing the pipeline before you ship
Before you point your production marketing site at this pipeline, run a smoke test on a controlled set. The minimum:
- Reference set. Pick five actual exports per tier — an icon, an illustration, a product screenshot, a marketing hero, and an OG card. Compress them through the matching preset.
- Eyeball before you measure. Open the compressed output next to the source. Anything that looks visibly worse than the original at 100% is a level too aggressive for that tier — turn it down before you keep going.
- Measure twice. Track size reduction and the resulting dimensions. Illustrations and product imagery should both shrink substantially — order-of-magnitude wins are common when Figma exports at 3x but the layout only needs 2x. OG cards should land comfortably under the platform-recommended ceiling. If the result looks visibly different from the source, the width cap is usually wrong, not the level.
- Run a CDN round-trip. Upload the compressed output to your bucket and request it back. CDNs sometimes auto-encode (Cloudflare Images can derive AVIF/WebP variants on the fly). Confirm the path you’ve engineered is what actually serves.
- Hand it to a designer. The pipeline is broken if the designer can’t tell whether a file has been processed. Make the compressed-output folder visible in Figma’s or Sketch’s export settings, or as a Finder favorite, so the policy is observable.
The point of the smoke test is not to catch every edge case. It is to make sure the second person who joins the team can produce the same compressed output the first person did, without writing a runbook.
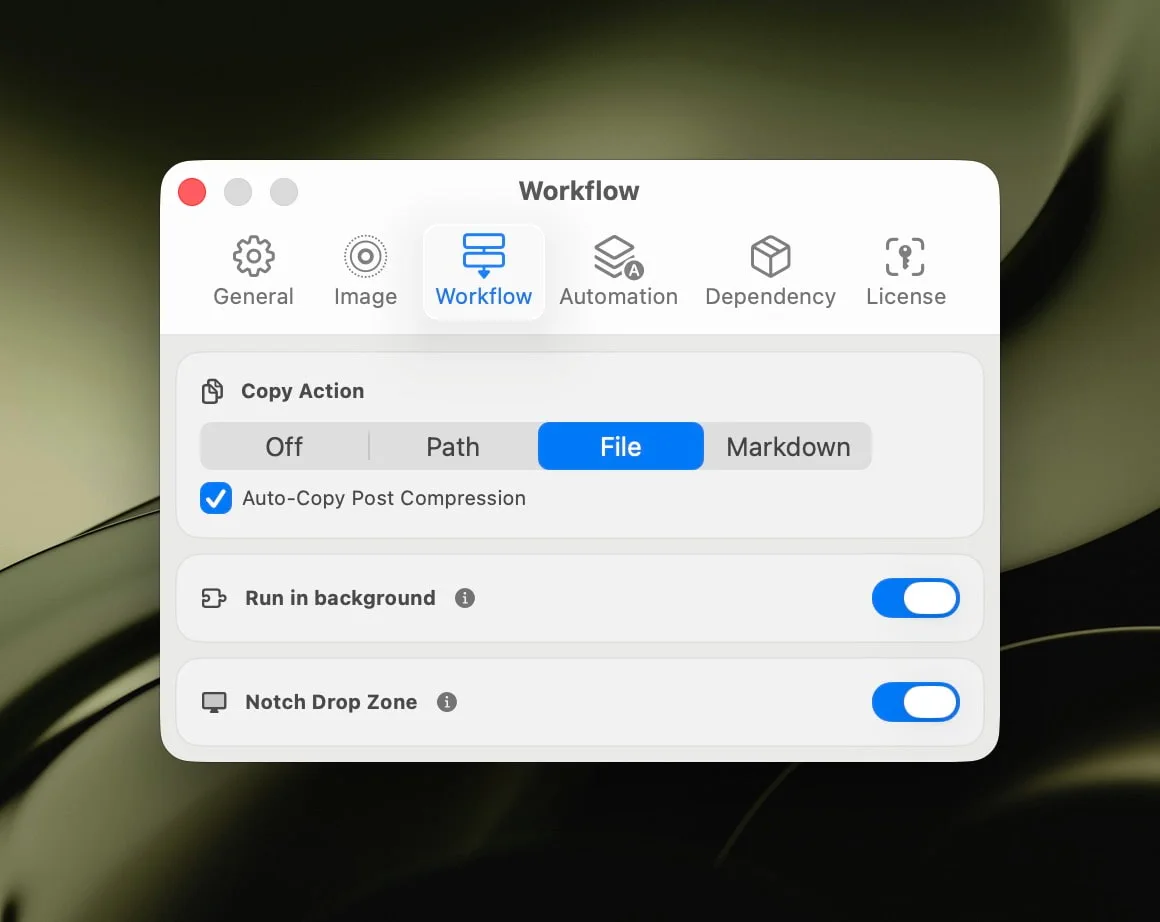
For teams that want the URL Scheme as a fallback (CI sweeps, post-merge hooks, build-time enforcement), the Workflow Integration guide documents every parameter; the same presets you defined for folder monitoring can be invoked by name from a script.
When a single preset is not enough
Two cases push beyond what folder monitoring handles cleanly:
- Conditional formats per route. If your marketing site serves AVIF to capable browsers and WebP elsewhere, you need the same source compressed twice. Solve it with two monitored folders fed from the same source via a sync —
04-marketing-webp/and04-marketing-avif/— each with its own preset. - Dark-mode variants. A logo that flips between dark and light needs paired exports. Encode the variant in the filename (
logo-dark-1x.svg,logo-light-1x.svg) and let the consuming markup pick.
In both cases, the pipeline shape stays the same: one folder, one preset, one explicit policy. Resist the urge to make a single preset “smart enough” to handle three branches — Zipic’s preset model is intentionally flat, and team comprehension drops fast once you start chaining conditions.
Related Articles
- Image Tools for Content Creators and Bloggers
- Image Compression for Web Developers
- Compress App Icons for iOS & Android: Mobile Dev Workflows
- How to Compress and Optimize SVG Files on Mac with Zipic
- macOS Automation: Auto-Compress with Folder Monitoring
- Automate Image Compression with Apple Shortcuts
Zipic documentation: Folder Monitoring Auto Compression · Workflow Integration · Image Compression Basic
Ready to standardize compression across your design system? Download Zipic and try the per-tier folder monitoring with Zipic Pro — one-time purchase, 7-day Pro trial, no subscription.
Related Reading
Batch Compress Images on Mac: 5 Fast Methods That Scale
Batch compress images on Mac with folders, Finder, Raycast, monitoring, or Shortcuts. Compare setup, automation, Pro needs, and safe output options.
How to Compress Images on Mac: 5 Methods That Work
Learn how to compress images on Mac with drag-and-drop, Finder, presets, format conversion, and batch automation while protecting originals and quality.
Compress a PDF Without Losing Quality: Diagnose It First
Learn how to compress a PDF without losing quality by diagnosing oversized images, export settings, and layout problems before choosing a compression level.
pngoptim Deep Dive: Zipic's PNG Compression Engine for Mac
See how Zipic uses pngoptim for Mac PNG compression: stable presets, APNG handling, ICNS workflow, and predictable batch results for teams.